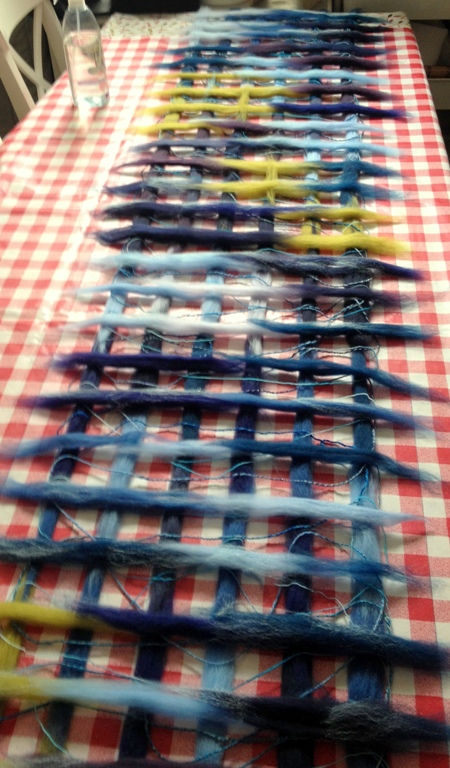
 After making my brightly colored network felted scarf, I decided to make one in blues. Here is the layout above. I decided to try something a bit different. In the previous scarf, I laid out the roving piece by piece as I feel it felts better and quicker that way even though it can take a very long time to lay out and is more fiddly when wetting. This time, I decided to split my roving into quarters and pull off longer pieces. When I first started felting over a year ago, I liked the idea of making paintings with wool and ended up buying some mixed bags of merino from World of Wool. The nice thing about a mixed bag is that you get to try out some colors in smaller amounts. I had purchased a bag of Wooly Waves. I still had a lot of colors I hadn’t used and this type of project is perfect for that as I wanted to use up my darker blues. I also used some Lichen green for contrast. I had a lovely handspun wool yarn that a friend from the guild made. It is a combination of different wools she hand dyed and spun with some bling fibers. You can’t really see it in the photos, but there is a bit of sparkle in there. I also used a very fine merino yarn that is more like a thick thread. I was a bit concerned how these would felt as they were both plied tight and sometimes it won’t stick to the roving. I felted and fulled the piece as I did before.
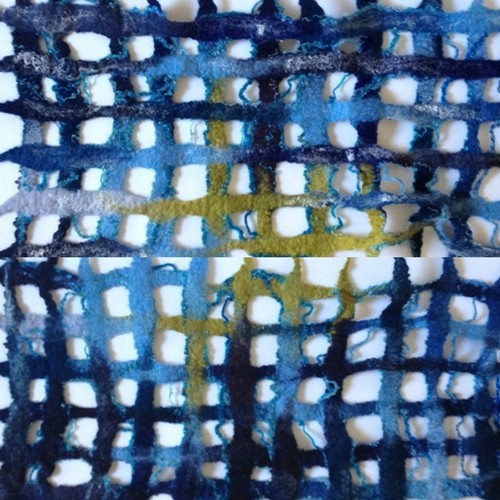 Here you can see both sides. On the horizontal layout I added silk fibers, viscose and some silk waste. You can also see that the yarns actually stuck to the wool. I was concerned as after sanding they weren’t really sticking very well and I ended up sanding on both sides. When working with yarns, I sometimes leave the work soaking for a day so the yarns can absorb the water to felt better, especially if it is 2-ply or more.


After fulling the scarf, I let it dry. I ended up having to full it some more as it didn’t felt nearly as well as I would have liked. I think that had a lot to do with the layout as the fibers were much longer. I didn’t want to over full it and make it too stiff. I was using 23mic merino as that is what I have. I shall only be ordering extra fine from now on for wearables. I had some leftover soap solution and I re-wet the scarf in that and fulled it some more on both sides on bubble wrap. I like using bubble wrap for fulling as it isn’t harsh. I also have a lot of bubbles that have popped as I have re-used it so often! I doesn’t get snagged if you use enough soap. Here it is without a brooch. The scarf is very light, but still warm. You can put one end through a hole to secure it as in the middle photo. You can also fold it in half to make it narrow.
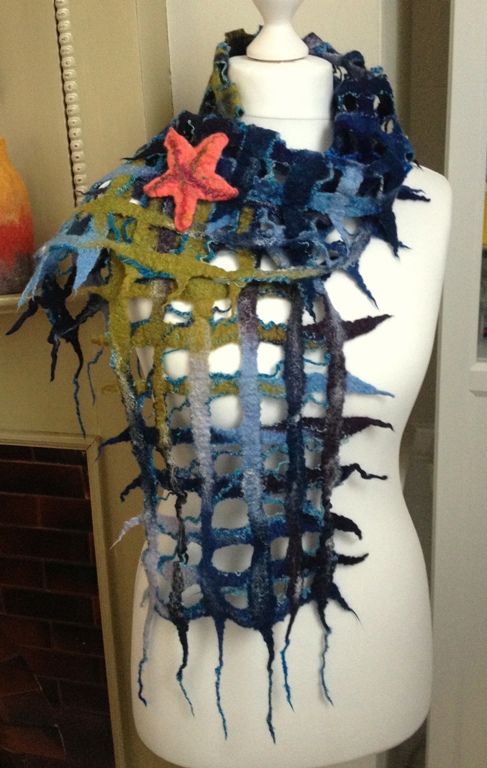
I thought it would be fun to make a starfish brooch in coral and sari silk fibers. I am still working on the brooch – it needs some beads. I thought the contrast would go well with the blue. It would also go well with my previous scarf. The brooch was fun and easy to make, so I may actually make more in different colors to add to my stash of brooches I was going to sell at the craft fair in April.
